May 8, 2018 at 9:05 AM
Print Ready PDF Files for Commercial Printing - 4 Keys for Success
 The portable document format (PDF) revolutionized commercial printing services by making it possible for anybody to supply print ready files, complete with all the text, graphics, and data. The PDF is largely responsible for the rapid growth and popularity of digital printing and print on demand. It's commonplace for printers to receive print ready PDF files for both offset printing and digital printing projects. Equally common is the discovery that the PDF files are not print ready.
Here are 4 Keys to ensuring your PDF is really print ready.
1) Bleeds and Trims
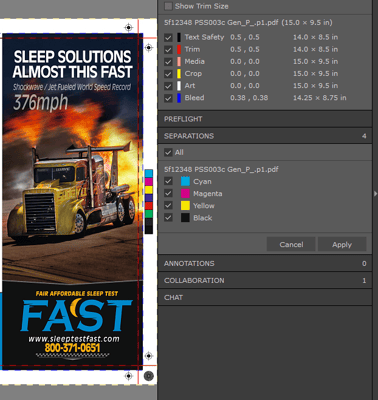
Unless you want a white border around the edges of your printed piece, be sure to add bleeds. A bleed is the extension of a graphic element beyond the edge of the finished page. The standard bleed is 1/8”. This additional 1/8” enables the printer to trim the sheet to the desired final size while eliminating any possibility of a white line at the edge. When you output your PDF file you want to be sure to turn on the Bleed Box and set the dimension to be a minimum of 1/8” outside the trim dimensions. Likewise, turn on the Trim Box and set the dimension to the desired final page dimensions. Any other marks such as folds or scores must be outside the final page dimensions.
2) Spot Colors vs Four Color Process
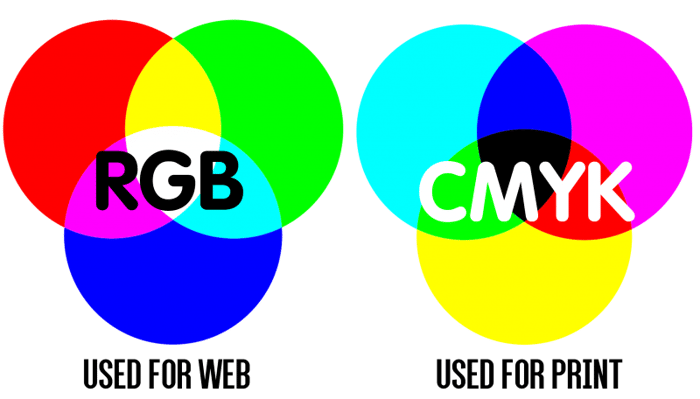
If no spot colors (Pantone Colors) are required to produce the printed piece the PDF should be converted to print CMYK (Cyan, Magenta, Yellow, Black) 4-Color Process. When printing digitally, pantone colors will be built from CMYK. Never send your printer RGB (Red Green Blue) color files. RGB color is used by displays and does not reflect the actual color of the printed piece. RGB can be converted to CMYK but the colors may not match perfectly. Any black text in your PDF should be 100% black. Also, do not set any white copy to overprint.
3) Image Resolution
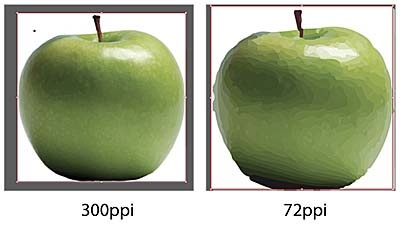
All images embedded in the PDF should be High Resolution. Ideally you should use images with a resolution of 300 pixels per inch (PPI) at 100% of the final image size, or at a minimum 150ppi. PPI is the resolution or clarity of an image, and describes the number of square pixels shown in one inch. A pixel is the smallest physical point in an image displayed onscreen. If you use low resolution images in your PDF it might look okay when displayed on a screen, but when enlarged to 100% actual size can appear blocky with jagged edges.
4) Fonts
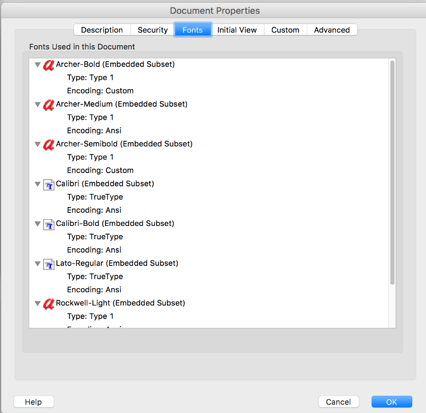
All fonts used in creating the piece should be embedded in the PDF. This allows your PDF to be viewed as intended by anybody who opens your PDF even if they don’t have a particular font installed. If you don’t embed all the fonts you used, your printer may not have one or more fonts and will have to either substitute or acquire. Substitution changes the look you intended. Acquiring a font usually results in the cost being billed on the final invoice. Another option is to convert your fonts to outlines. This eliminates the need for fonts.
To save time and money, eliminate the need for your printer to have to ask you for new files or edit your files for you. Any PDF file you furnish to your printer should include bleeds, trim marks, embedded images with a minimum 150ppi, and with all fonts embedded. If you take the time to ensure your PDF has these elements your files will meet the criteria for being print ready.
Popular Posts

Memorial Weekend
Landing Pages
Learn Why Omnichannel Marketing is Trending

Direct Mail


